Showing posts with label process. Show all posts

Monday, April 1, 2024

And moving on....

 With grandchildren poised to arrive at any moment, 

The hexie shape with two triangles was added.


I thought I'd give a quick update on my latest start. 

It might be a while til I get back to it....!


A black and white version to check tonal balance

It's now called "Violet Crumble" after the iconic 

Australian honeycomb candy bar.


The quilt is constructed in diagonal rows, pinning 

carefully at points of the triangles.


Yes, I like a challenge!

I still have the long centre rows to join...

but it's fun to see the star shapes appearing.


Hopefully, I'll be back soon with the flimsy complete!

Happy sewing!

SUZ

Sunday, March 24, 2024

A new start

 As I mentioned in my previous post, I have another 

quilt started!

A friend shared a quilt she had finished and I wanted to 

make one too!


Hers was made following the pattern by 

Stitched In Color called Honeycomb Stars.

It seems Moda published something similar back in 

2013.

I also found a similar design called Juggle by 

Bonnie and Camille, (photo taken from here 

   https://thimbleblossoms.com/products/juggle-pdf-pattern )


Then I found a website where I could print off a

 template and made a freezer paper one and got 

cutting!


I'm using my precious stash of Heather Ross fabrics....


And making much larger hexies!


It will certainly make a statement!


Now to cut out the adjoining triangles from my stash of 

solids,

and I can start sewing.


Happy days!

Suz


Thursday, February 22, 2024

Motivation

 Hello, I'm back!


It's amazing what a break filled with sea, sunshine and 

total relaxation does for one's mojo.

Before I went on my little road trip...... 


I made some progress on my "Le Finestre" quilt.....


I celebrated a birthday recently 


and my special friend Elizabeth sent me some lovely 

fabric and a sweet pair of scissors!


Who wouldn't be motivated?

Some of these fat quarters were $2.50!

I also purchased some new fabric to add to another 

project I started just before I left.


It is the "Checkered Garden" tutorial  

by "Film in the Fridge", available here 


It comes together so well!


I've now made four....


They finish at 14" square, so I am aiming for a 

3 by 3 arrangement 

to give a baby quilt of 42" square.


I love how they look together


And looking forward to making five more soon!


I hope I remember how to use my sewing machine......🤔

Happy days!

SUZ


Wednesday, January 4, 2023

A new year, a new project!

 Not my tissue covers....


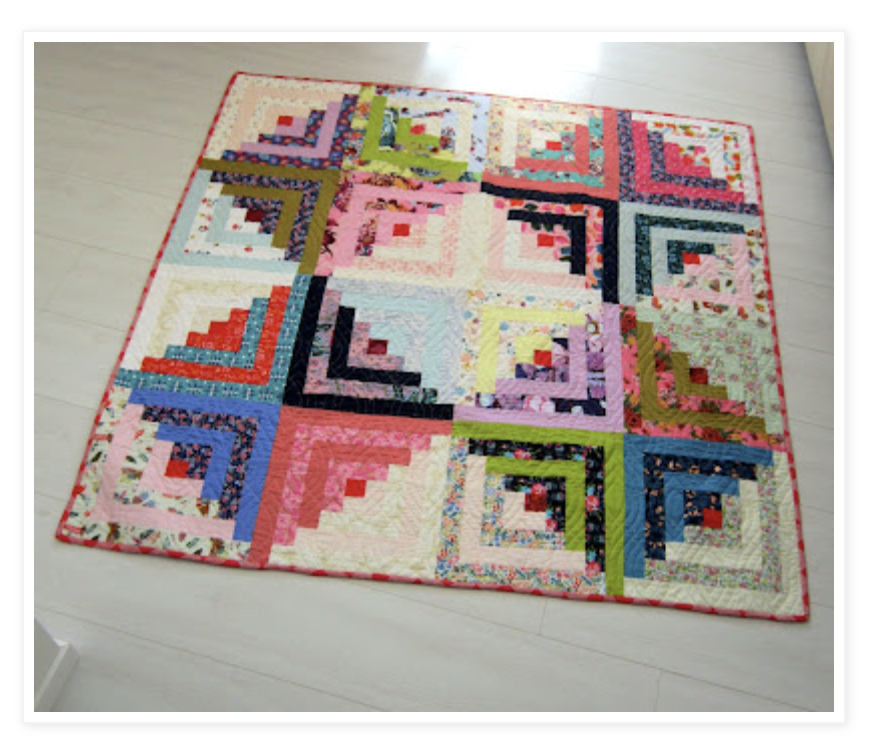
            Although they are a quick and easy make!

I've long admired the quilts made by Linda at KokaQuilts


Check out the beautiful quilts she makes....


And when I saw her Log Cabin quilt, I knew I had to make one too. 

I've lifted this directly from her website. I know she won't mind!


There's also a sew-along happening on Instagram 

and while I 

considered joining in, I could not justify paying over 

$20 for the pattern that was required to join in... 

I mean, it's a log cabin block for goodness sake!

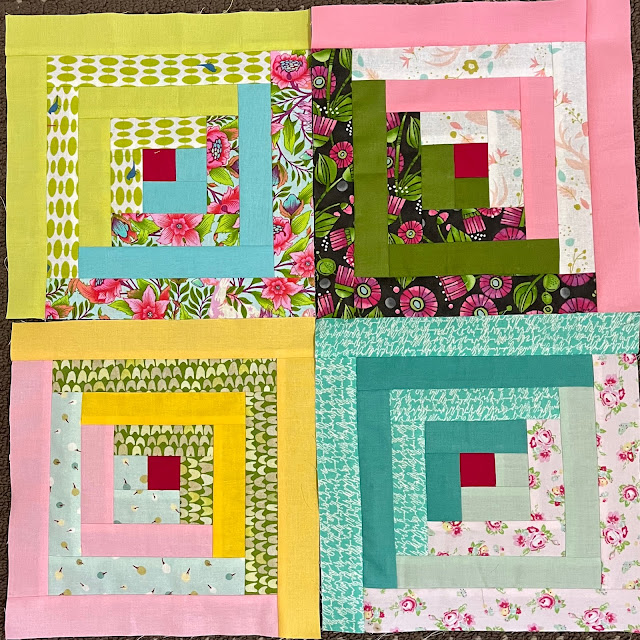
This became a test block- the yellow fabric is different shades!

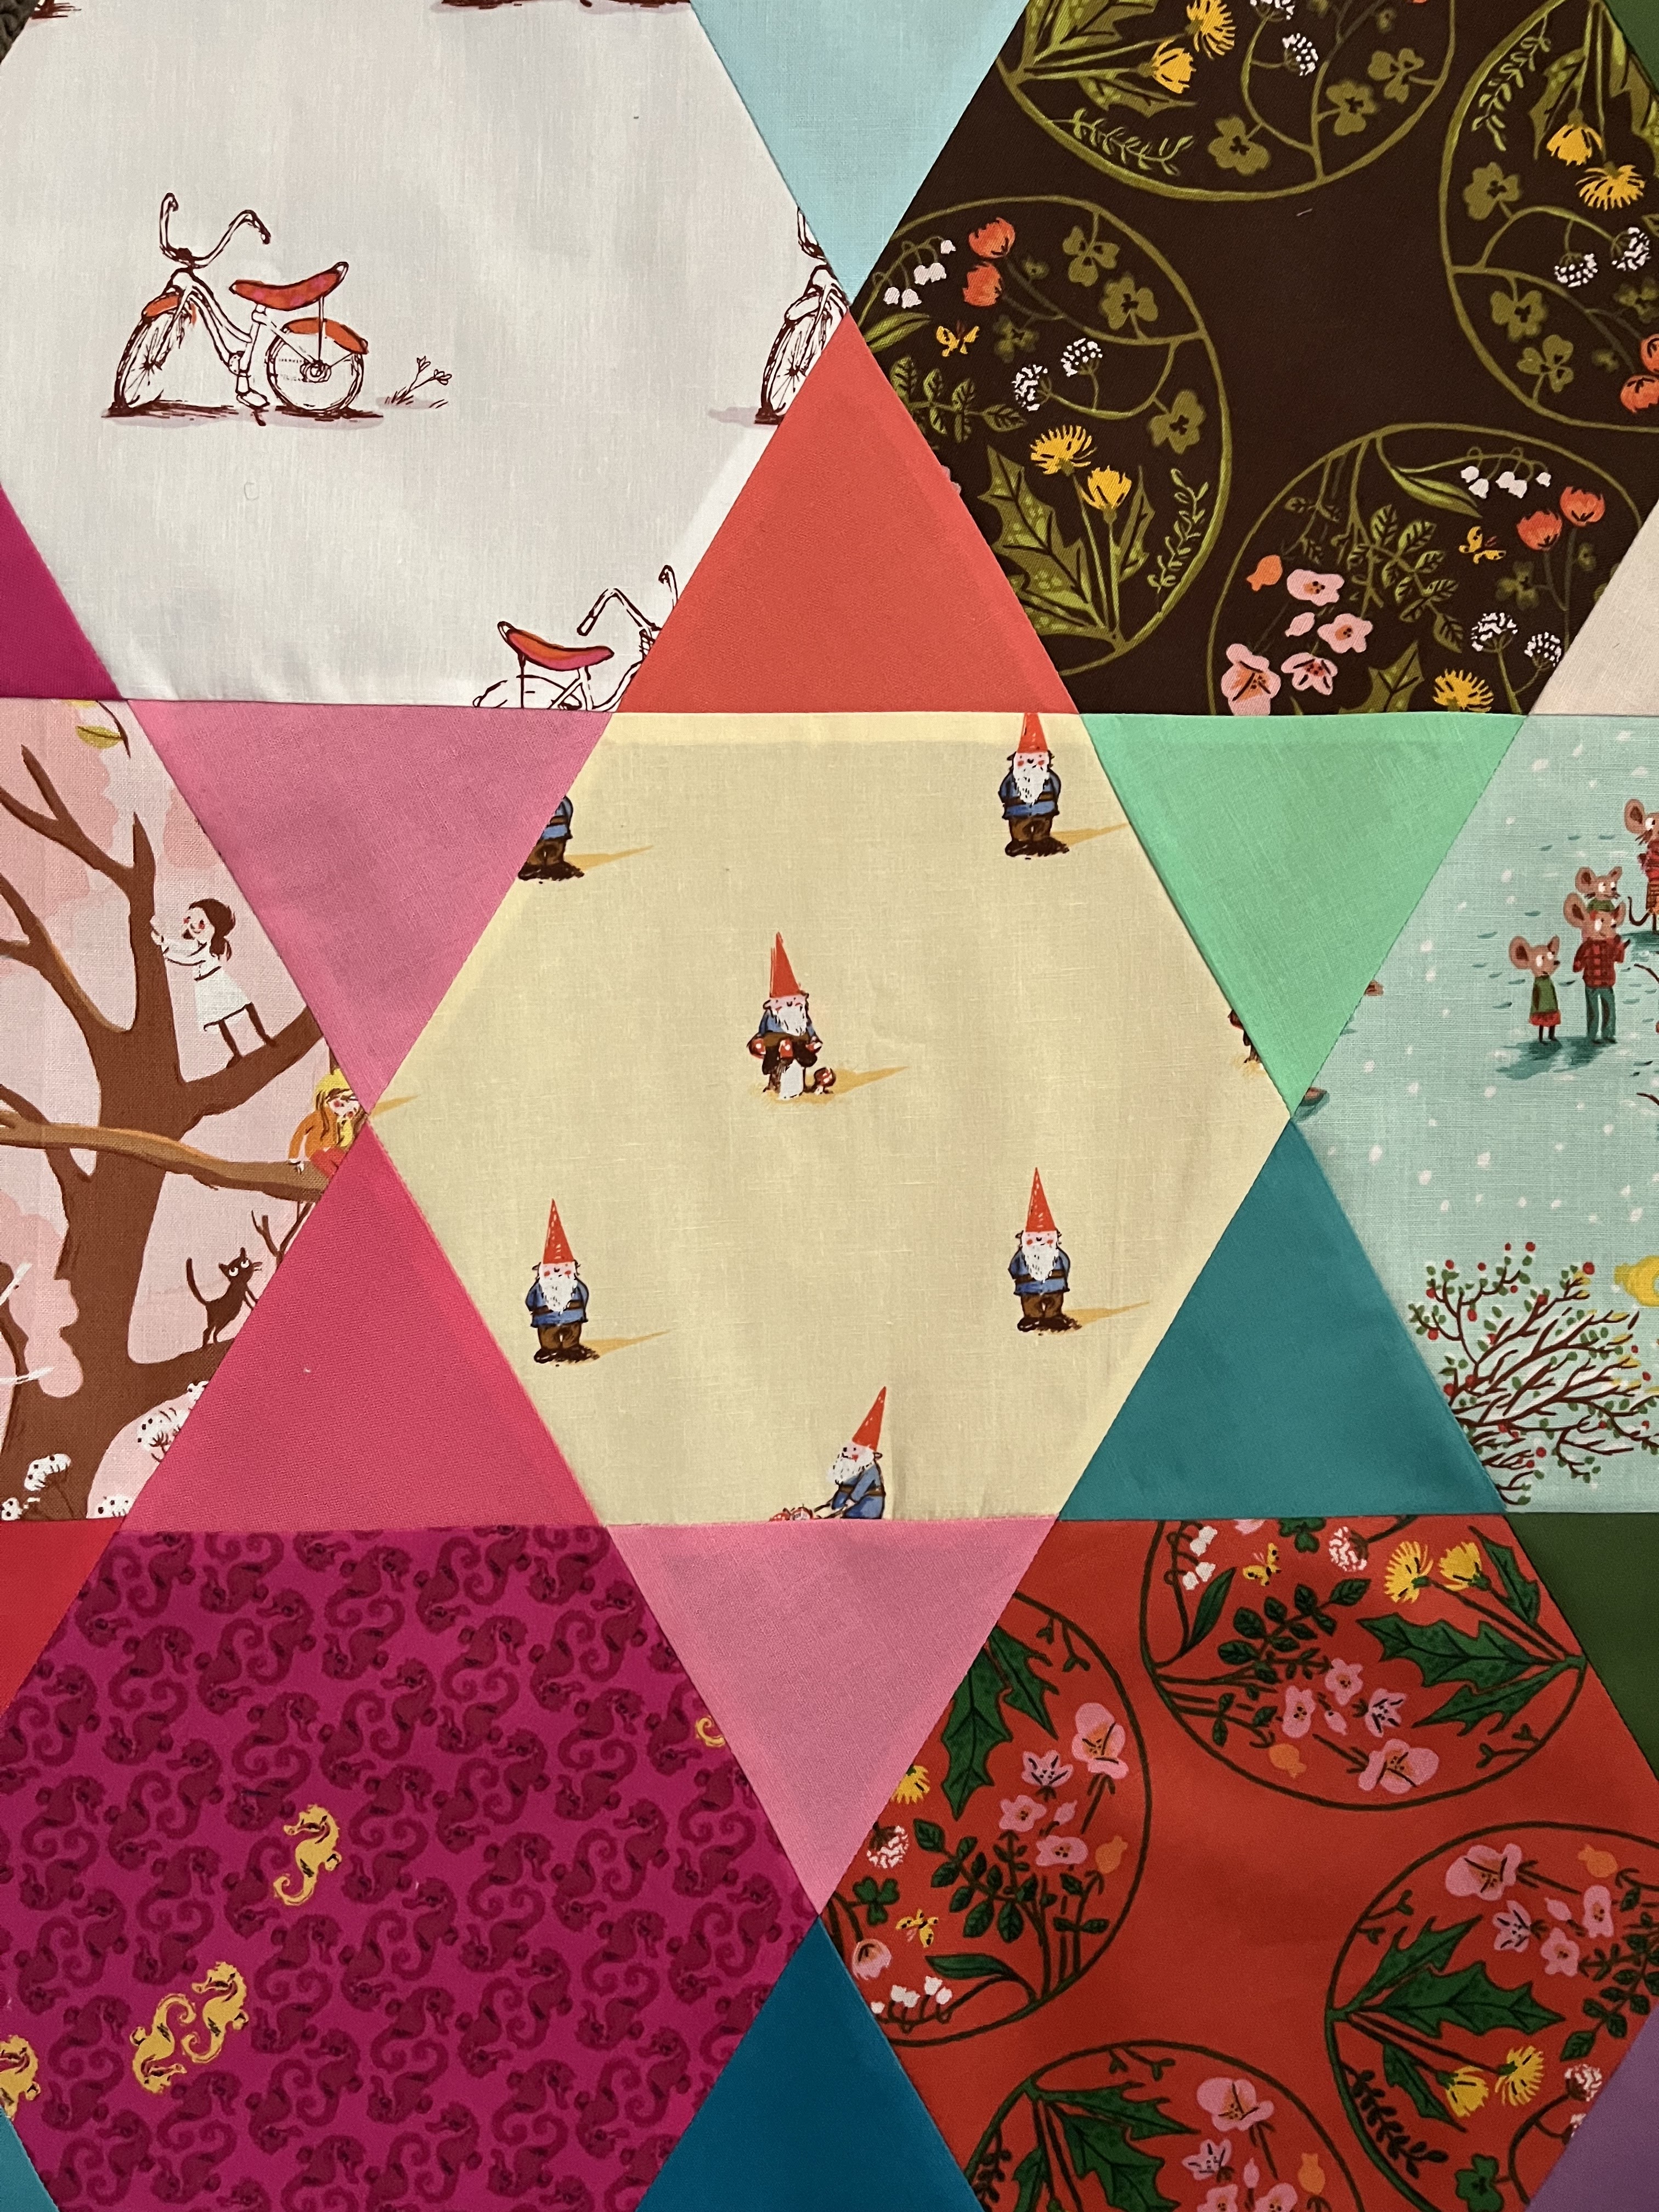
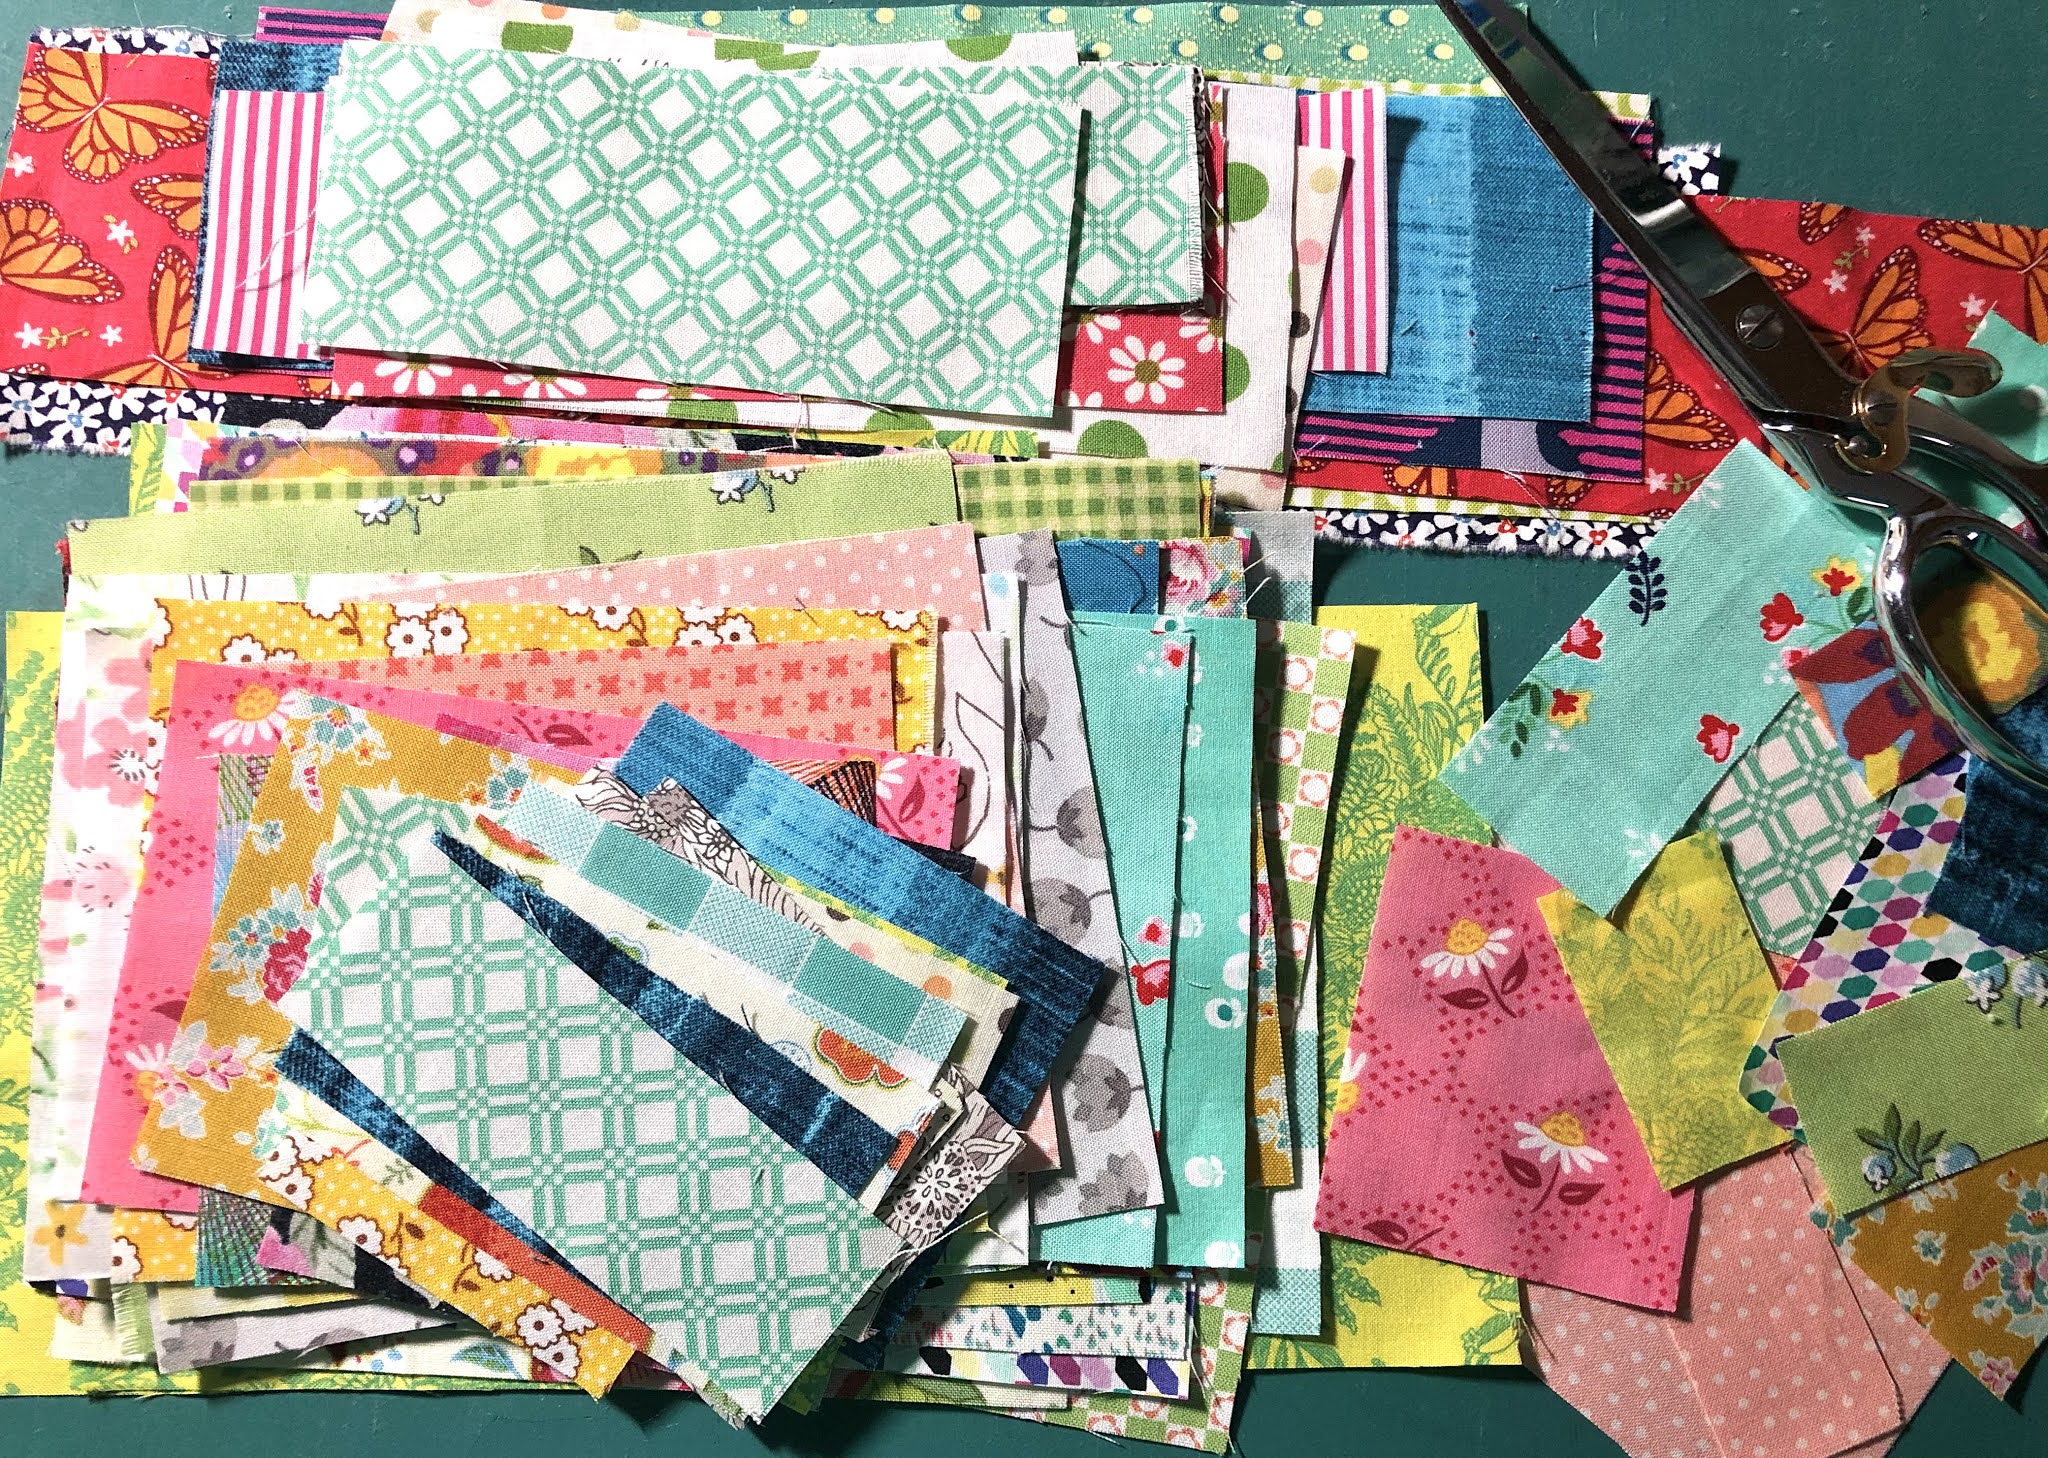
Initially, I was hoping to use my scraps but after getting 

frustrated looking for suitably sized fabric, I've now 

resorted to stash. 

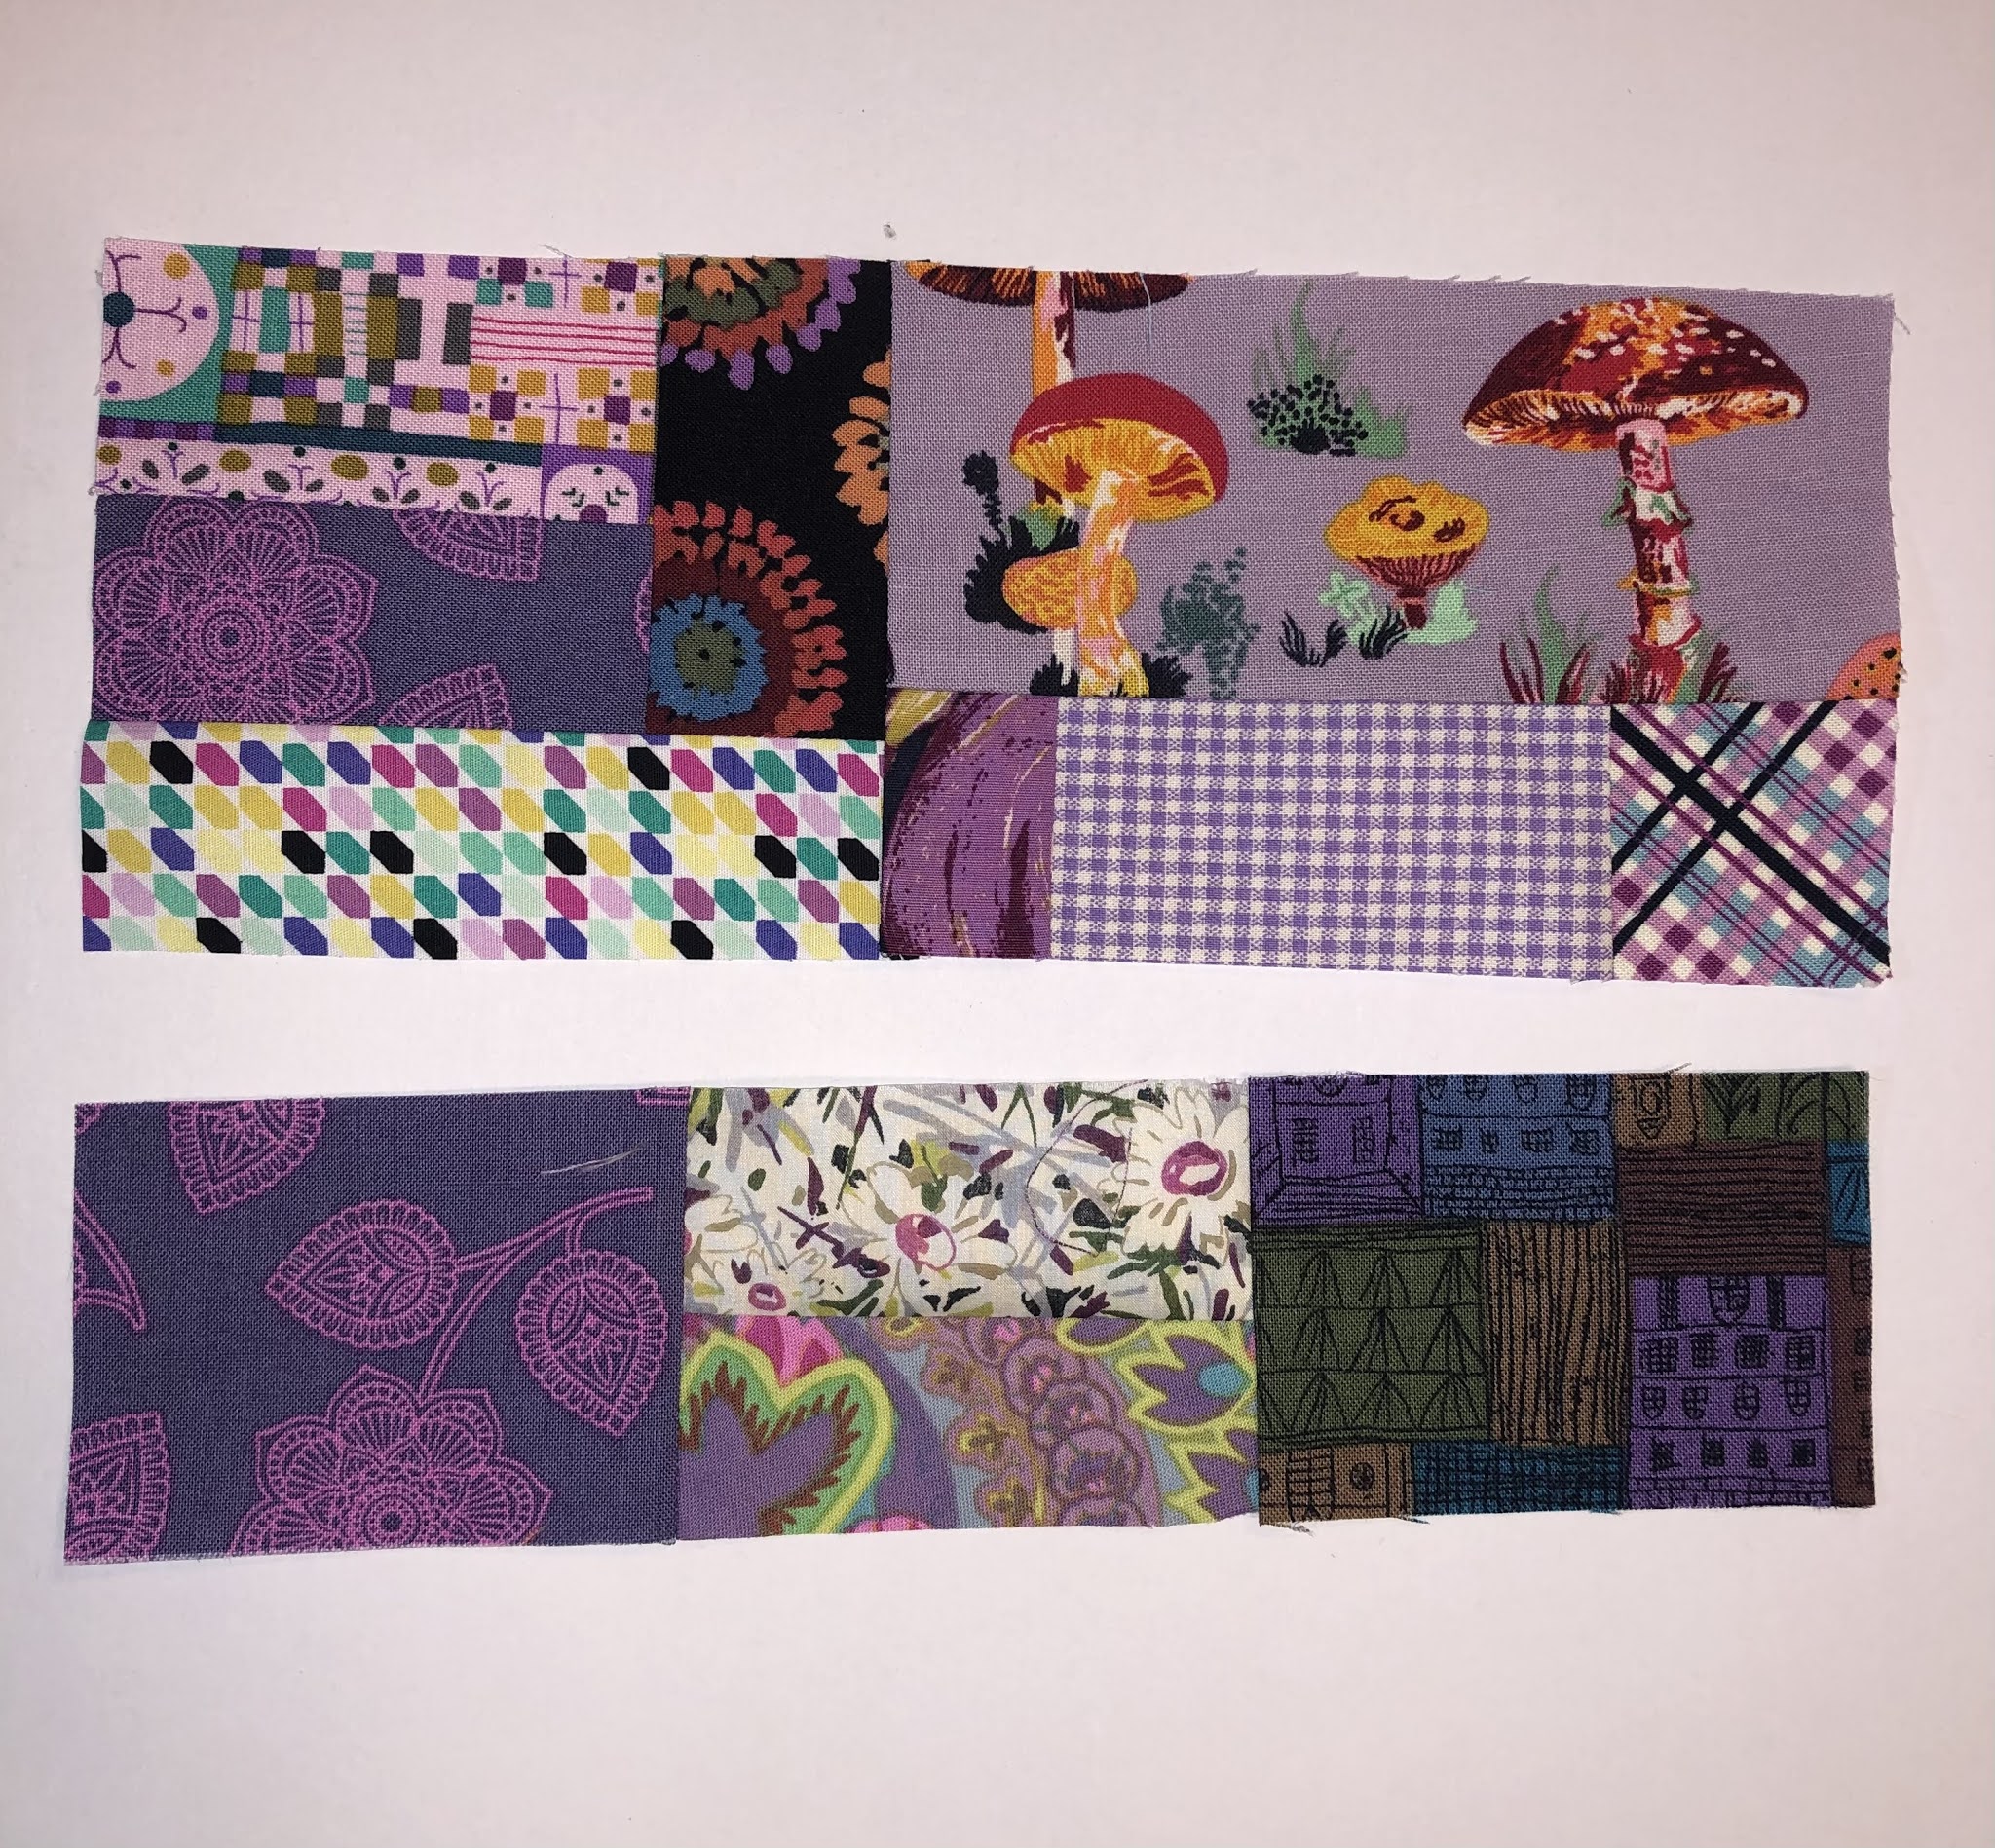
In fact I unpicked another block too...

You can tell from this photo (above)the effect I am 

aiming for.

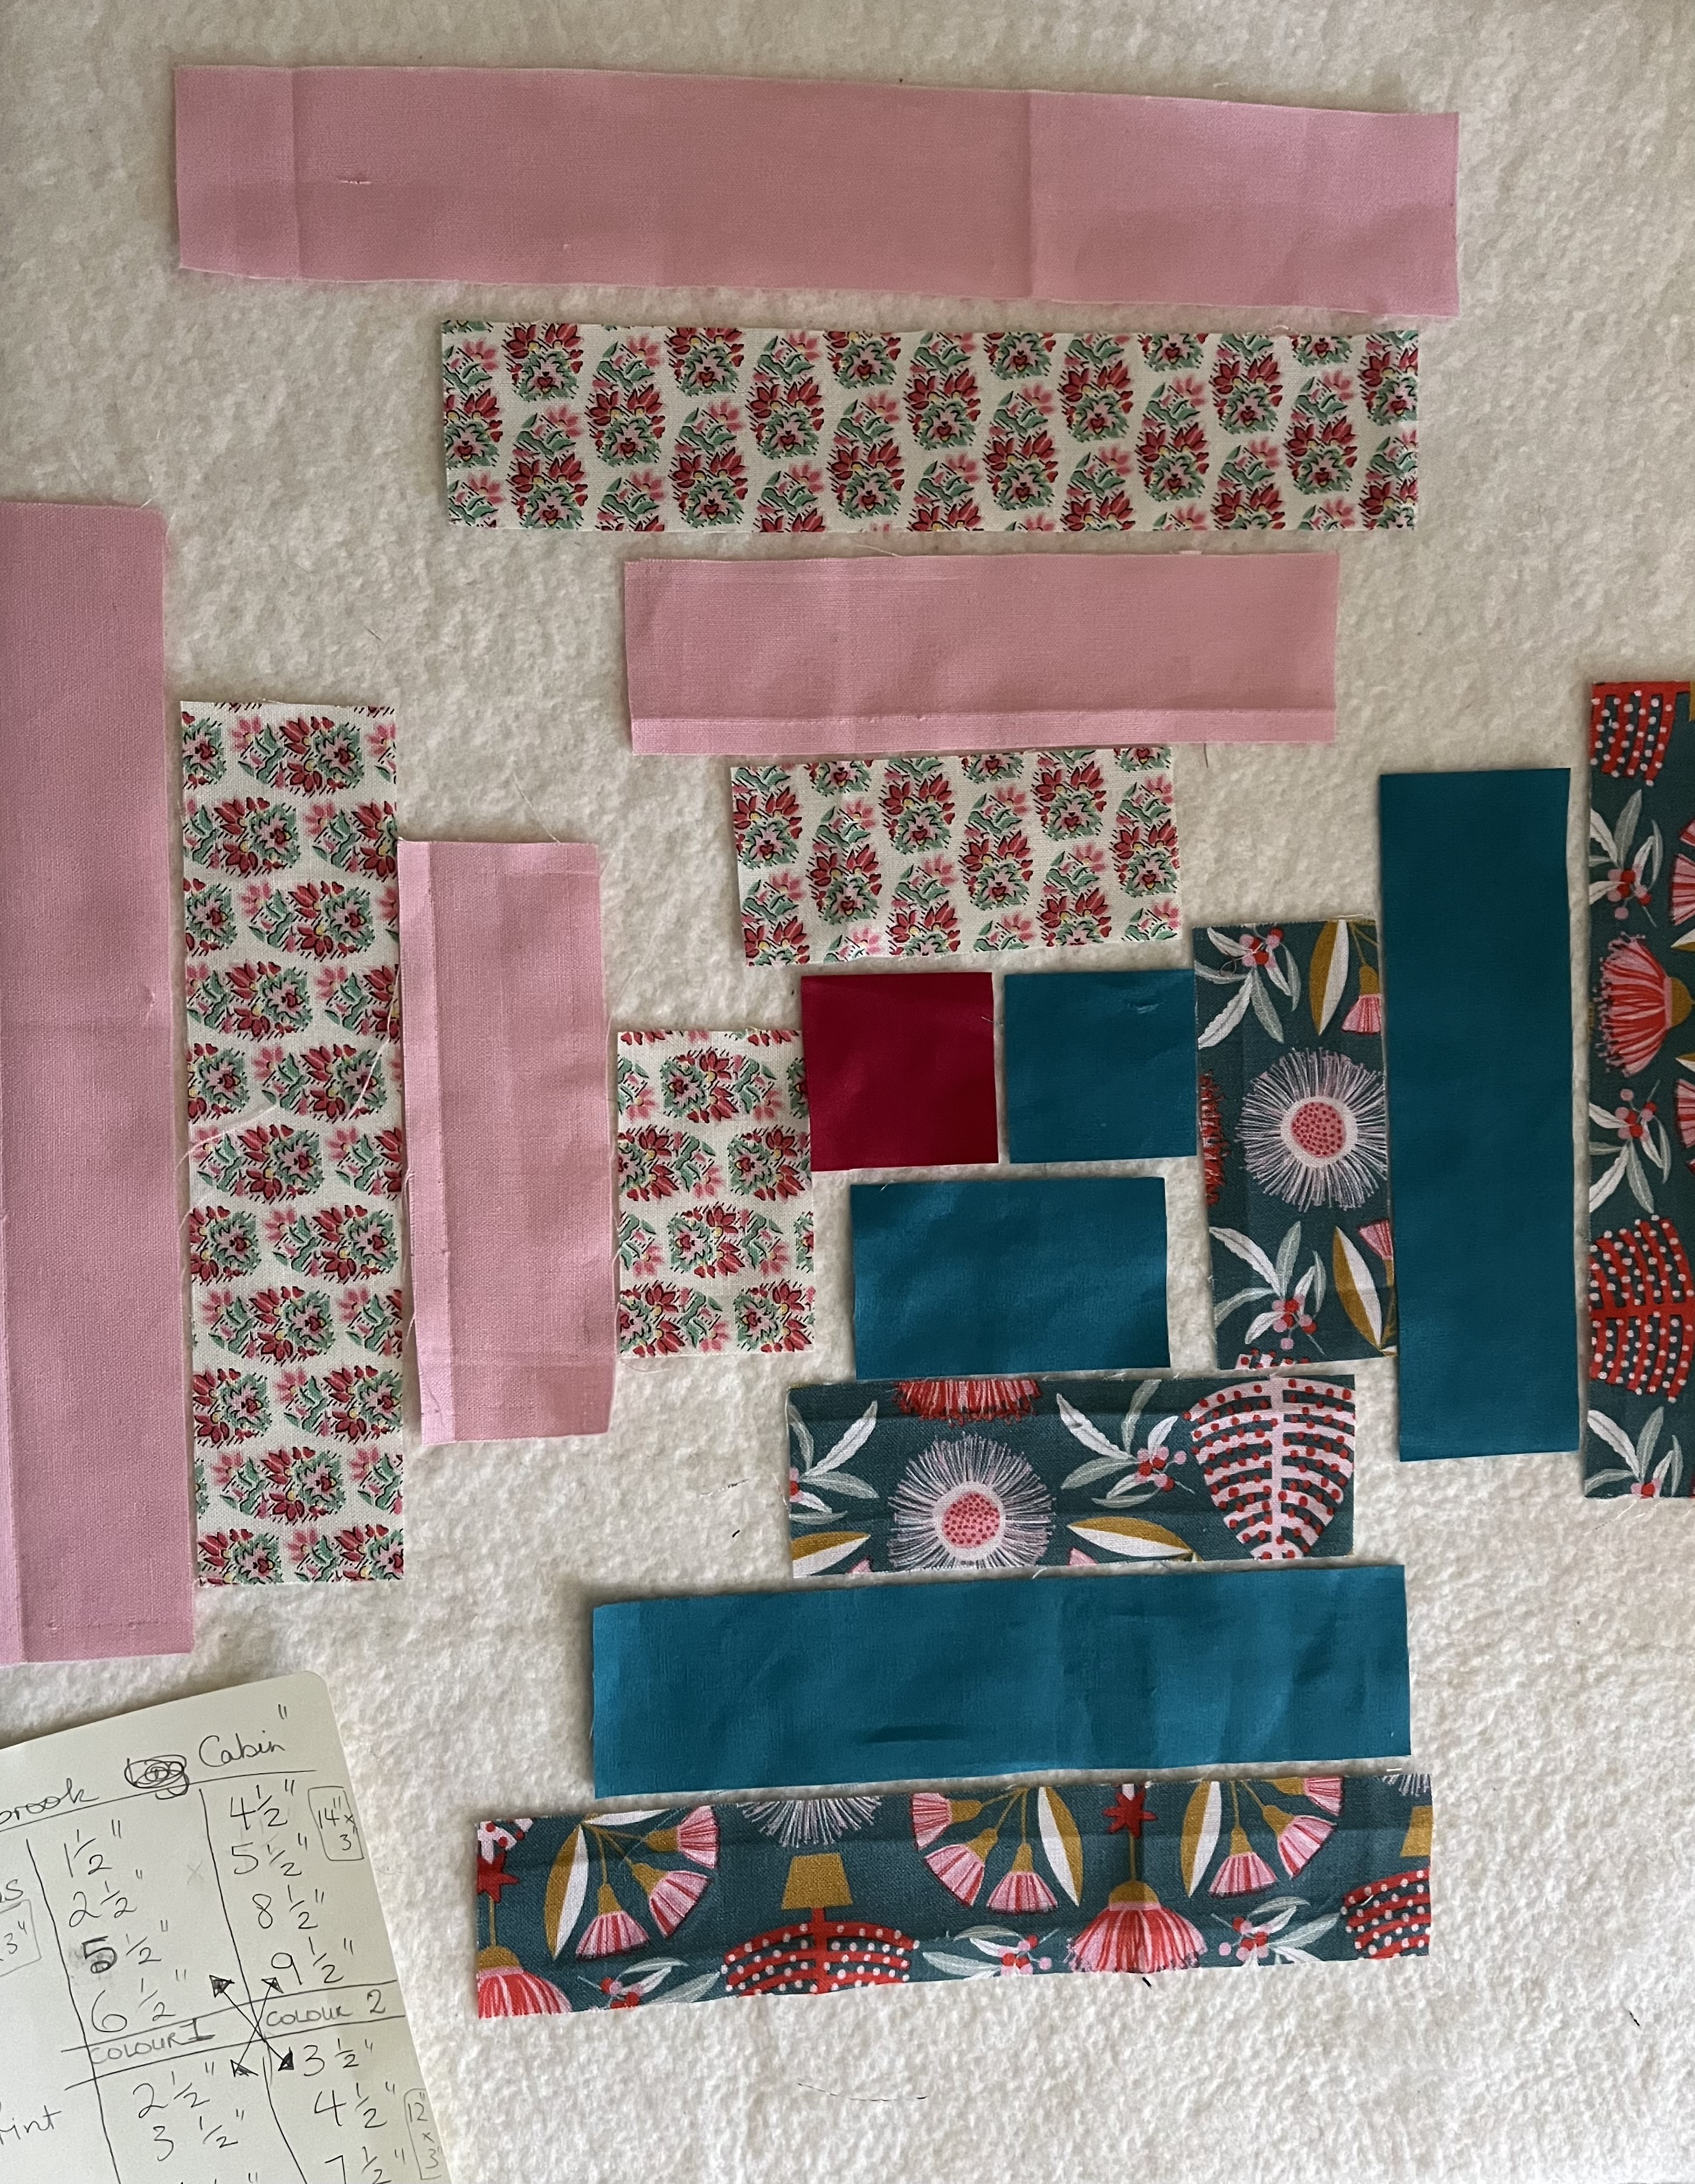
I decided I needed more of a plan after all the random 

piecing and piles of messy fabric...


creating my own cutting plan.


Laying all the prepared pieces on my newly covered 

design board made for an efficient piecing process.


I have my solids sorted but I definitely need to 

supplement them with a purchase of some

blue and greens, and maybe some pretty strong florals!

Oh, I've decided to call it Carisbrook Cabin and hope to 

get photos here....

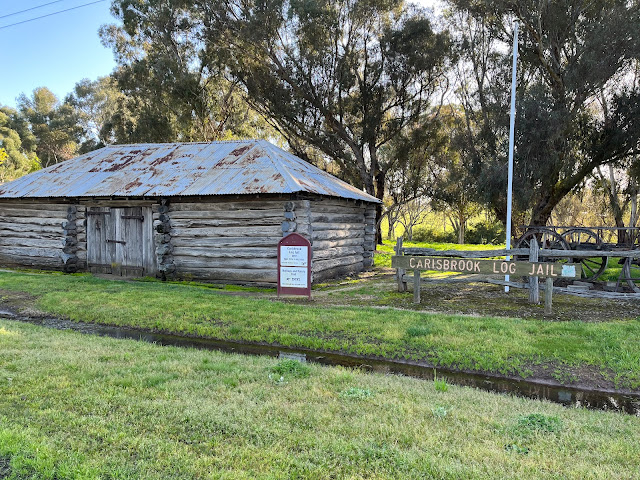
The Carisbrook Log Cabin Jail built in 1851

when it is finished! 

The jail is probably not as cosy as a cabin, but this is as close as it gets!


There aren't a lot of log cabins in

Australia.😄

Happy days,

SUZ

Tuesday, May 25, 2021

Building Blocks

I had a comment from Kit Kat on my last blogpost,

wondering if I had any hints about making my scrappy 

rainbow blocks.

So I thought I would share my process with you.


Firstly I find all my small pieces, either squarish or 

rectangular. 

Notice that they are not perfectly straight.

I start chain piecing three or four 'units'.

I don't press or trim at this early stage, preferring to 

give a good finger press while I build my block.


I'm aiming for a block that is about 9" square,

so I use the ruler on my machine table to keep things 

on track.


Time to press and trim!

Not everything will fit together perfectly, but trimming

doesn't worry me.... 


they are scraps, after all!

As I knew the block was wide enough, I just kept 

piecing to make another 9" wide unit.


I just needed one last narrow unit to get the block up to 

size.


I try to keep the small pieces in the middle of the block.

I don't want them trimmed off to make my block the 

correct size. 

Or lost in a seam allowance once it is pieced with its 

rainbow neighbour.


(If you still have questions, please leave me a comment, but make sure you are not a 'no-reply commenter', or leave your email address in the comment.)

I'm still making scraps, trimming up fabric from my 

Bessie Creek Rd quilt....


Most are larger and may be stored separately, for 

foundation paper piecing or a Scrappy Sandwiches quilt 

perhaps?


I've celebrated my scrap organisation by treating myself 

to some new fabric,

including some new Monika Forsberg!

Happy sewing!

SUZ


Sunday, February 21, 2021

Processing....

 My Bessie Creek Road quilt is slowly coming along....

I hand pieced the centre star


        and it's playing nicely with its neighbours.


      All twenty of the hexie flowers are complete...


I have now also finished the circle squares...

made my way!


I pieced a four patch block and then ironed a freezer 

paper template to the back,


cut it out with a 1/4" seam 

and painted a thin line of Flatter, a spray type starch, 

around the edge, before pressing.

This Flatter spray smell amazing!


This helps the seam to sit down flat for applique!

It was then time to see how the blocks were looking 

altogether.


This arrangement (above) is the square version, but

 not the actual one, but shows most of the blocks 

                            complete so far.

    
    This is how the layout will look, except the hexie         
                  blocks will be in the outer rounds.

      Four more different designed blocks to do.... 

                        mostly hand piecing!

                    So lots of prep still to come!
                                
                                Happy sewing!

                                    SUZ

               Please excuse the horrid formatting. Blogger doesn't behave like it used to!

Related Posts Plugin for WordPress, Blogger...